How to Self-Host Jellyfin with Docker
What Is Jellyfin?
Jellyfin is a free, open-source media server that lets you stream your own movies, TV shows, music, books, and photos to any device. It started as a fork of Emby after Emby went partially closed-source, and has since grown into one of the most active self-hosted projects on GitHub.
There are no paid tiers, no tracking, no telemetry, and no “phone home” behavior. You own every piece of the stack. Client apps exist for Android, iOS, Android TV, Fire TV, Roku, Kodi, and web browsers. If you want a media server with zero strings attached, Jellyfin is it.
Jellyfin replaces Plex (proprietary, paid features gated behind Plex Pass) and Emby (partially open-source, premium tier required for hardware transcoding).
Prerequisites
- A Linux server (Ubuntu 22.04+ recommended)
- Docker and Docker Compose installed (guide)
- 2 GB of RAM minimum (4 GB+ recommended if you plan to transcode)
- Media files on accessible storage (local drives, NAS mounts, or external USB)
- A domain name (optional, for remote access via reverse proxy)
Docker Compose Configuration
Create a directory for your Jellyfin stack:
mkdir -p /opt/jellyfin
cd /opt/jellyfin
Create a docker-compose.yml file:
services:
  jellyfin:
    image: jellyfin/jellyfin:10.11.6
    container_name: jellyfin
    user: "1000:1000"  # Change to match your host user's UID:GID
    group_add:
      - "122"  # Render group ID for hardware transcoding — run: getent group render | cut -d: -f3
    ports:
      - "8096:8096/tcp"   # Web UI
      - "7359:7359/udp"   # Client auto-discovery on local network
    volumes:
      - jellyfin-config:/config        # Jellyfin configuration and database
      - jellyfin-cache:/cache          # Transcoding cache and image cache
      - /path/to/movies:/media/movies:ro       # Your movie library (read-only)
      - /path/to/tv:/media/tv:ro               # Your TV show library (read-only)
      - /path/to/music:/media/music:ro         # Your music library (read-only)
    environment:
      - JELLYFIN_PublishedServerUrl=http://your-server-ip:8096  # Used for auto-discovery — set to your LAN IP or domain
    devices:
      - /dev/dri/renderD128:/dev/dri/renderD128  # Intel/AMD GPU for hardware transcoding (remove if not using)
    restart: unless-stopped

volumes:
  jellyfin-config:
  jellyfin-cache:
Key configuration notes:
user: "1000:1000"— Run the container as your host user instead of root. Find your UID and GID withid. Your media files must be readable by this user.group_add: "122"— Required for GPU access. Get your system’s render group ID by runninggetent group render | cut -d: -f3. If the group doesn’t exist, remove this line and thedevicessection.- Media volumes are read-only (
:ro) — Jellyfin never needs to write to your media directories. This protects your files from accidental modification. JELLYFIN_PublishedServerUrl— Set this to your server’s LAN IP address (e.g.,http://192.168.1.50:8096) or your domain. This is used by client apps for auto-discovery.devices— Passes through the Intel/AMD GPU render device for hardware transcoding. Remove this line entirely if your server has no GPU or you don’t need transcoding.
Start the stack:
docker compose up -dVerify it’s running:
docker compose logs -f jellyfinYou should see Jellyfin start up and report that it’s listening on port 8096.
Initial Setup
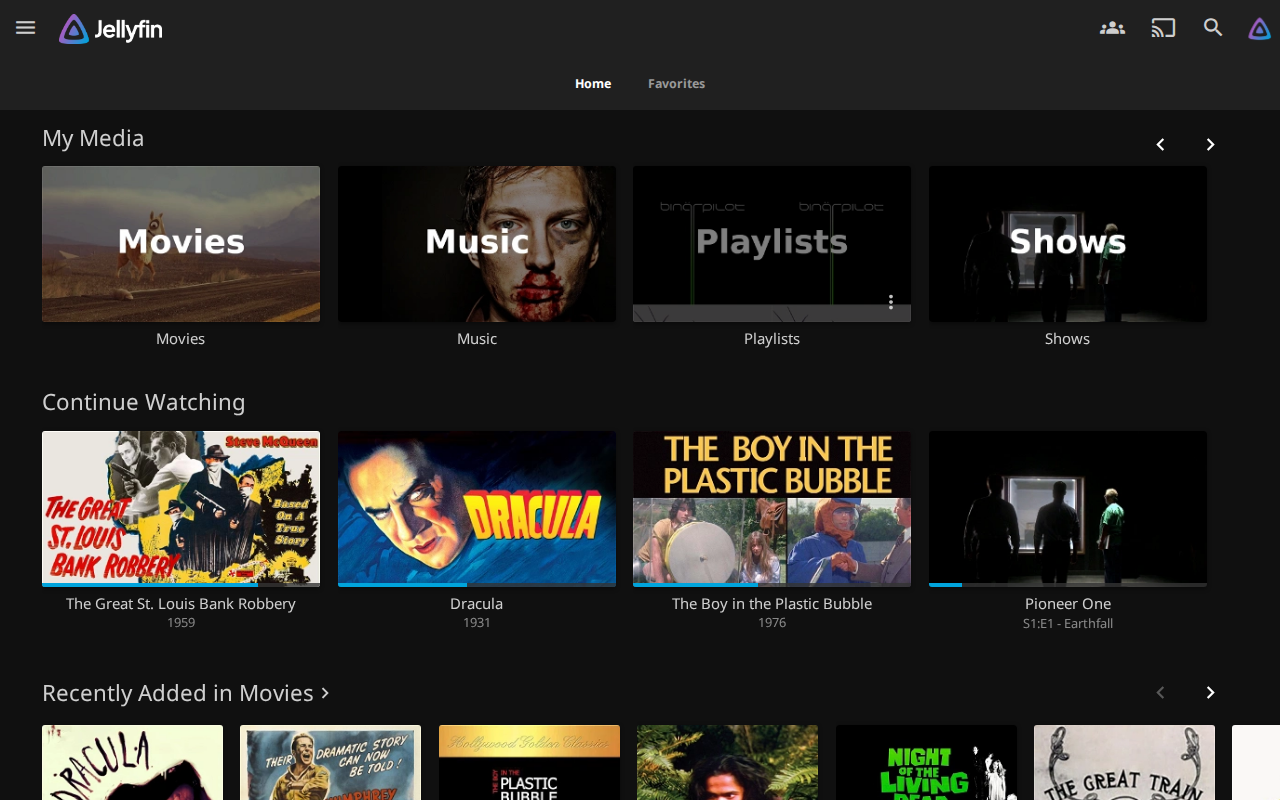
Open your browser and go to http://your-server-ip:8096. The setup wizard walks you through:
- Language — Select your preferred language.
- Create admin user — Pick a strong username and password. This is the only account with full admin access.
- Add media libraries — Click “Add Media Library” for each content type:
- Movies → Content type: Movies → Folder:
/media/movies - TV Shows → Content type: Shows → Folder:
/media/tv - Music → Content type: Music → Folder:
/media/music
- Movies → Content type: Movies → Folder:
- Metadata language — Set your preferred metadata language and country for media matching.
- Remote access — Enable “Allow remote connections to this server” if you plan to access Jellyfin outside your LAN. Leave the port at 8096.
- Finish — Complete the wizard and log in with your admin credentials.
Jellyfin immediately begins scanning your libraries and downloading metadata. Large libraries (10,000+ files) may take a few hours for the initial scan.
Configuration
Media Libraries
Jellyfin relies on consistent file naming to match your media with metadata. Follow these conventions:
Movies:
/media/movies/
  Movie Name (2024)/
    Movie Name (2024).mkv
TV Shows:
/media/tv/
  Show Name (2020)/
    Season 01/
      Show Name S01E01.mkv
      Show Name S01E02.mkv
Music:
/media/music/
  Artist Name/
    Album Name (2023)/
      01 - Track Name.flac
Consistent naming eliminates 90% of metadata matching problems. If Jellyfin can’t identify a file, check the filename first.
Metadata and Artwork
Jellyfin pulls metadata from TMDb (movies/TV), MusicBrainz (music), and other providers by default. You can configure the provider priority per library:
- Go to Dashboard → Libraries → select a library → Manage Library.
- Under Metadata Downloaders, drag providers into your preferred order.
- Enable NFO file support if you have existing
.nfosidecar files from other tools.
For subtitles, install the Open Subtitles plugin (see Plugins section below) to automatically download subtitles in your preferred languages.
Users and Access Control
Go to Dashboard → Users to manage accounts:
- Create accounts for family members. Each user gets their own watch history, favorites, and playback position.
- Restrict library access per user — hide certain libraries from specific users (e.g., keep adult content invisible to child accounts).
- Parental controls — Set maximum parental rating per user and block unrated content.
- Disable transcoding per user — If a user’s device always supports direct play, disabling transcoding saves server resources.
Playback Settings
Under Dashboard → Playback → Transcoding:
- Hardware acceleration — Select your GPU type (VAAPI for Intel/AMD, NVENC for NVIDIA). Covered in detail below.
- Thread count — Leave at 0 (auto-detect) unless you want to limit CPU usage.
- Throttle transcoding — Enable this to reduce CPU load during transcoding. Jellyfin transcodes just enough to stay ahead of playback instead of transcoding the entire file at once.
Per-user bitrate limits can be set under each user’s profile. This is useful for remote users on slow connections — cap them at 8 Mbps instead of letting them transcode at full quality.
Advanced Configuration
Hardware Transcoding
Software transcoding uses the CPU and is slow and power-hungry. Hardware transcoding offloads the work to a GPU and is dramatically faster at a fraction of the power cost. Jellyfin supports three main GPU types.
Intel QuickSync (VAAPI) — Recommended
Intel integrated GPUs (found in most Intel CPUs, including N100 mini PCs) offer the best value for transcoding. The Docker Compose example above already includes the necessary device passthrough.
Verify the GPU is accessible inside the container:
docker exec -it jellyfin ls -la /dev/dri/You should see renderD128 listed. Then enable VAAPI in the Jellyfin dashboard:
- Go to Dashboard → Playback → Transcoding.
- Set Hardware acceleration to
Video Acceleration API (VAAPI). - Set VA-API Device to
/dev/dri/renderD128. - Enable the codecs your GPU supports (H.264 and HEVC are supported on most Intel GPUs from Haswell onward).
- Enable Hardware encoding and Tone mapping if your GPU supports it (Intel 10th gen+).
NVIDIA NVENC
If your server has an NVIDIA GPU, replace the devices and group_add sections in your docker-compose.yml with:
services:
  jellyfin:
    # ... other config stays the same ...
    runtime: nvidia
    deploy:
      resources:
        reservations:
          devices:
            - driver: nvidia
              count: all
              capabilities: [gpu]
You must install the NVIDIA Container Toolkit on the host first. After starting the container, verify GPU access:
docker exec -it jellyfin nvidia-smiIn the dashboard, set hardware acceleration to NVIDIA NVENC.
AMD AMF
AMD GPUs use the same VAAPI device passthrough as Intel (/dev/dri/renderD128). In the dashboard, select Video Acceleration API (VAAPI) and enable the codecs your AMD GPU supports. AMD transcoding support is less mature than Intel or NVIDIA — Intel QuickSync is the better choice for a dedicated transcoding setup.
Plugins
Install plugins from Dashboard → Plugins → Catalog. The most useful ones:
- Open Subtitles — Automatic subtitle downloads. Requires a free opensubtitles.org account. Configure your preferred languages after installation.
- Fanart — Higher-quality artwork from fanart.tv.
- Bookshelf — Adds eBook and audiobook support with metadata from Google Books and Open Library.
- Intro Skipper — Detects and marks TV show intros so users can skip them. Requires a one-time analysis pass over your library.
- LDAP Authentication — Integrate with an existing LDAP/Active Directory server for centralized user management.
Live TV and DVR
Jellyfin supports live TV through HDHomeRun tuners and IPTV/M3U streams:
- Go to Dashboard → Live TV and add a tuner (HDHomeRun auto-discovers on the network, or paste an M3U URL for IPTV).
- Add an EPG (Electronic Program Guide) data source — XMLTV format. Free EPG sources are available for many regions.
- Once configured, Live TV appears as a library with a channel guide, recording scheduler, and DVR functionality.
Networking
For remote access, put Jellyfin behind a reverse proxy rather than exposing port 8096 directly to the internet.
Jellyfin uses WebSockets for SyncPlay (synchronized playback across multiple clients). Your reverse proxy must support WebSocket connections, or SyncPlay will not work. Both Nginx Proxy Manager and Caddy handle this without extra configuration. For Nginx directly, ensure you include proxy_set_header Upgrade $http_upgrade and proxy_set_header Connection "upgrade" in your config.
Reverse Proxy
Jellyfin works behind any standard reverse proxy. The key requirement is WebSocket support for SyncPlay and real-time dashboard updates.
For Caddy (simplest option):
jellyfin.yourdomain.com {
    reverse_proxy localhost:8096
}
For Nginx Proxy Manager, add a new proxy host pointing to http://your-server-ip:8096 with WebSocket support enabled.
After setting up the reverse proxy, update JELLYFIN_PublishedServerUrl in your docker-compose.yml to your public domain (e.g., https://jellyfin.yourdomain.com) and restart the container.
See the full Reverse Proxy Setup guide for detailed instructions.
Backup
The /config volume contains everything Jellyfin needs: the database, user accounts, watch history, playback positions, library metadata, and server settings. Back up this volume and you can restore a complete Jellyfin instance.
The /cache volume is expendable — it contains transcoding artifacts and cached images that Jellyfin regenerates automatically.
Your media files should be backed up separately as part of your overall backup strategy.
To back up the config volume:
docker compose stop jellyfin
tar czf jellyfin-config-backup-$(date +%Y%m%d).tar.gz /var/lib/docker/volumes/jellyfin-config/
docker compose start jellyfin
Stop the container before backing up to avoid database corruption. For zero-downtime backups, use a filesystem snapshot tool.
Troubleshooting
Buffering During Playback
Symptom: Video pauses to buffer frequently, especially on remote clients.
Fix: Open the Jellyfin dashboard while playing content. If the “Transcode Reasons” section shows active transcoding, the server is struggling to keep up. Enable hardware transcoding to fix this. If transcoding is already hardware-accelerated, check your network bandwidth — a single 4K transcode needs 20+ Mbps. Consider setting per-user bitrate limits under Dashboard → Users → [user] → Playback.
Metadata Not Matching
Symptom: Movies or TV shows show wrong metadata, no poster, or don’t appear in the library at all.
Fix: Verify your file naming follows the conventions in the Media Libraries section. For stubborn files, right-click the item → Identify to manually search and match. Check that your metadata provider order hasn’t been changed. TMDb should be the primary provider for movies and TV.
Hardware Transcoding Not Working
Symptom: Jellyfin falls back to software transcoding despite GPU configuration.
Fix: Verify the device is passed through correctly:
docker exec -it jellyfin ls -la /dev/dri/If renderD128 is missing, check your docker-compose.yml devices section. If the device is present but transcoding still fails, verify the group_add value matches your host’s render group ID (getent group render | cut -d: -f3). Restart the container after any changes.
Remote Access Not Working
Symptom: Clients outside the local network cannot connect.
Fix: If using a reverse proxy, verify JELLYFIN_PublishedServerUrl matches your public URL. Check that your reverse proxy is forwarding WebSocket connections. If exposing directly (not recommended), verify port 8096 is forwarded in your router and allowed through your firewall (sudo ufw allow 8096/tcp).
High CPU During Transcoding
Symptom: CPU usage spikes to 100% during playback.
Fix: This means software transcoding is active. Enable hardware transcoding (see above). If hardware transcoding is already enabled, check that it’s actually being used in the dashboard’s active streams view. For libraries with many incompatible formats, consider pre-transcoding with Tdarr to convert files to a format most clients can direct-play (H.264 in MP4 is the safest choice).
For more detailed troubleshooting, see:
Resource Requirements
- RAM: ~500 MB idle, 1-2 GB during software transcoding, 800 MB-1 GB during hardware transcoding
- CPU: Low (direct play), very high (software transcoding), low (hardware transcoding)
- Disk: ~500 MB for application and config data, plus your media library size. The transcoding cache can grow to several GB during active use — allocate at least 10 GB of free space for the cache volume.
Verdict
Jellyfin is the best self-hosted media server for most people. It is completely free with no paid tiers, no telemetry, and no features locked behind a subscription. Plex still has a slight edge in client app polish and automatic media matching, but Jellyfin has closed the gap substantially — and Plex’s increasing push toward ad-supported content and account-required playback makes it harder to recommend every year.
Hardware transcoding with Intel QuickSync works excellently in Jellyfin and requires nothing more than a $100 N100 mini PC. The client app ecosystem covers every major platform. The plugin system is extensible without being overwhelming.
If you want a media server that you fully own and control, Jellyfin is the answer. Start here, and only look at Plex or Emby if you hit a specific limitation that Jellyfin can’t solve.
Frequently Asked Questions
How much RAM does Jellyfin need?
Jellyfin idles at around 500 MB. Software transcoding pushes usage to 1-2 GB, while hardware transcoding with an Intel GPU typically stays under 1 GB. For a household with 2-3 concurrent streams using hardware transcoding, 4 GB of total system RAM is comfortable.
Can Jellyfin play 4K HDR content?
Yes, but how depends on your client. If your client supports direct play of 4K HEVC with HDR metadata (most modern smart TVs, Apple TV 4K, NVIDIA Shield), the server just sends the file as-is with no CPU/GPU load. If the client cannot play the format natively, Jellyfin transcodes it — which requires a capable GPU (Intel 10th gen+ or NVIDIA GTX 1050+ for HDR tone mapping). Avoid software transcoding 4K content; it requires a very powerful CPU and still produces poor results.
Does Jellyfin work without hardware transcoding?
Yes. If all your clients support the formats your media is stored in, Jellyfin direct-plays everything with zero transcoding. Hardware transcoding is only needed when a client requests a different format or lower bitrate than the original file. Most modern devices direct-play H.264 content in MP4 containers without issues.
Can I migrate from Plex to Jellyfin?
There is no official migration tool, but community tools exist. Your media files do not need to change — point Jellyfin at the same directories. Watch history can be partially migrated using third-party tools like Jellyplist or Tautulli export. The biggest effort is reconfiguring users, libraries, and any custom settings. Plan for a weekend if you have a large library.
How do I add subtitles?
Install the Open Subtitles plugin from Dashboard > Plugins > Catalog. Create a free account at opensubtitles.org, enter your credentials in the plugin settings, and configure your preferred languages. Jellyfin automatically downloads subtitles for new media during library scans. For existing media, trigger a manual scan. You can also drop .srt or .ass subtitle files alongside your media files — Jellyfin picks them up automatically if the filename matches.
Can multiple users stream simultaneously?
Yes, there is no artificial user or stream limit. The practical limit depends on your server hardware. Direct play streams consume almost no server resources, so you could run dozens concurrently. Each hardware-transcoded stream uses roughly one GPU encode slot — Intel QuickSync on an N100 handles 3-4 simultaneous 1080p transcodes comfortably. Software transcoding is the bottleneck; a modern quad-core CPU handles about 1-2 simultaneous software transcodes.
Is Jellyfin really completely free?
Yes. Jellyfin is licensed under GPL-2.0 with no paid tiers, no premium features, no telemetry, and no account requirement. Every feature — including hardware transcoding, remote access, multiple users, and live TV — is included for free. This is the single biggest differentiator from Plex (which gates hardware transcoding, offline sync, and skip intro behind a $120 lifetime Plex Pass).
How do I update Jellyfin?
Update the image tag in your docker-compose.yml to the new version, then pull and recreate the container:
docker compose pull
docker compose up -d
Always read the release notes before updating. Back up your /config volume before major version upgrades. Jellyfin handles database migrations automatically on startup.
Related
- Jellyfin Remote Access Not Working: Fix Guide
- Plex vs Jellyfin: Which Media Server Wins?
- Jellyfin vs Emby vs Plex: Complete Comparison
- Best Self-Hosted Media Servers
- Jellyfin vs Plex
- Jellyfin vs Emby
- Dim vs Jellyfin
- Jellyfin vs Navidrome for Music
- Jellyfin vs Plex for Music
- Jellyfin vs Plex vs Emby
- Navidrome vs Jellyfin
- Jellyfin Transcoding Not Working: Fix Guide
- Docker Compose Basics
- Docker Volumes
- Reverse Proxy Setup
- Self-Hosted Alternatives to Apple TV+
- Plex vs Jellyfin Hardware Requirements
- Backup Strategy
- Audiobookshelf vs Jellyfin
- Getting Started with Self-Hosting
Get self-hosting tips in your inbox
Get the Docker Compose configs, hardware picks, and setup shortcuts we don't put in articles. Weekly. No spam.
Comments